Part 1. Planning interface with ability to trigger data action
With each new release SAP Analytics Cloud provide a lot of interesting features which combine Business Intelligence, planning and prediction areas. One of the most interesting is utilize hidden possibilities included in SAP Analytics Designer, which significantly improve developing visualization and advanced applications
The text consist of three parts, which describe how to extend planning application with features such as:
- Data Action Trigger, eg. Transfer data from source to target model (or modify it)
- Blocking planning options after displaying the planning form
- Calling popup window with additional
data planning parameters .
In simple terms, the case concerns two process steps, i.e .:
- Copying source data,
- Preparation of planning data (initial plan).
At the beginning we should define individual parts of planning interface. In below screen I higlited three parts of the interface. First part include widgets, which user can use for a data preparation. Second part it’s used for data filtering and unlock ability to planning. Last one part calling popup window where user can actualize data
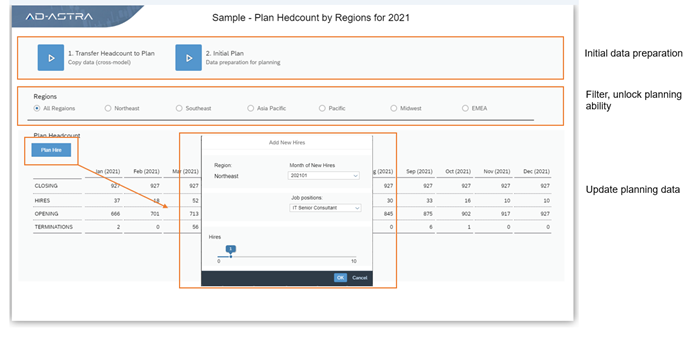
If we already know what each part of the interface does, we can proceed to configuration.
The first part is related to the preparation of data for planning. Let's imagine a case where the initial data for 2021 is prepared on the basis of data from the previous year (2020). Technically, you need to copy the data from the source model to the target / planning model. In the second step of data preparation, we will modify it so that it’s ready for planning. Below screen describe how widget like „Data Action Trigger” works, which triggers defined „Data Action”. Data Action it’s nothing else as the possibility to define activities on data like data copying, complex calculation based on scrypt.
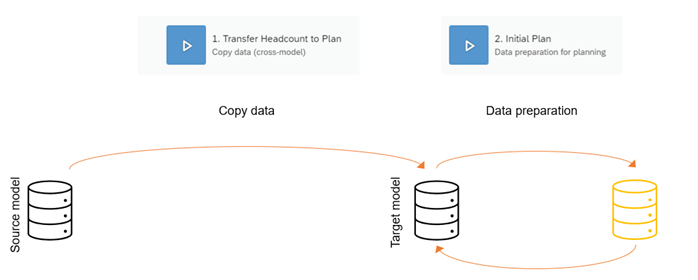
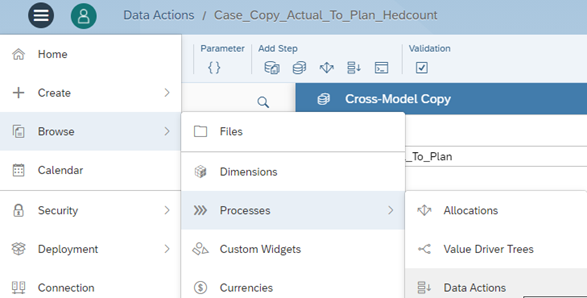
You can choose Data Acation from main menu:
Copying data between models is hidden under the name "Add Cross Model Copy Step". Firstly, you need to define the source model and the target model, and perform model structure mapping. Additionally, you can use filters to restrict data.
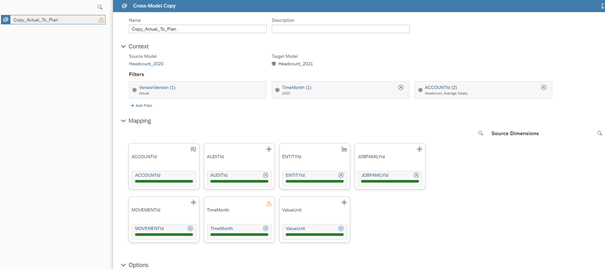
After saving the Data Action, in order to perform data transfter you need to use the Data Action Trigger in planning interface.
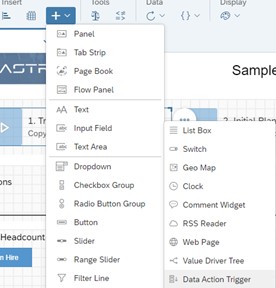
So, First button is ready to use: 1. Transfer Headcount to Plan

Result:
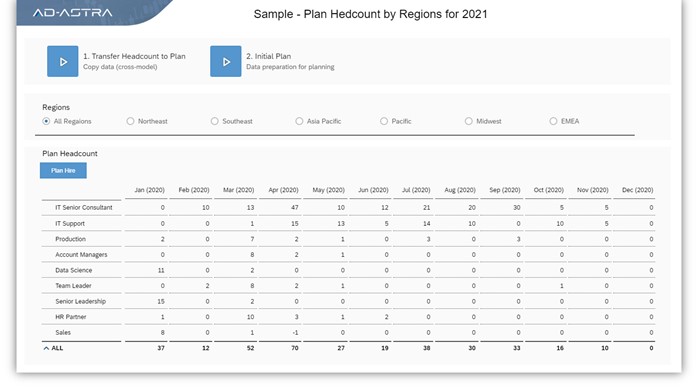
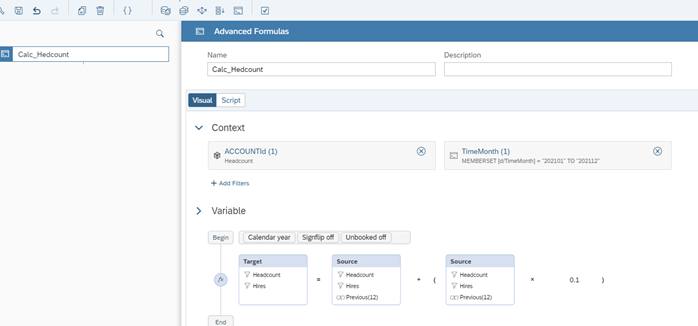
Using the graphical interface (Data Action) you can define formula, which modify data according to assumptions:
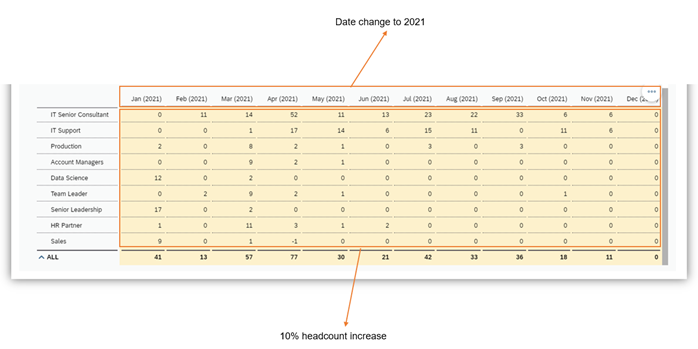
- change date - from 2020 to 2021
- 10 % headcount increase
Using the graphic interface (Data Action), a formula has been defined that will transform the data after it is run:
Second Data Action Trigger is ready to use:

This way, the initial data is now ready for planning.
The next article will describe the use case of filter components and additional popups which help in updating selected planning items.
Link do drugiej część artykułu:
https://ad-astra.com.pl/en/2021/02/01/sap-analytics-cloud-analytics-designer/


Pingback: SAP Analytics Cloud – Analytics Designer. Część 2. Formatka planistyczna – Ad-Astra Consulting