As an addition to the previous articles on Business Layer in SAP Data Warehouse Cloud, we will also present how to quickly and easily add a time dimension to this layer using functionalities built in DWC. We will rely on data and objects created in previous publications (you can find part one HERE) .
First, we must use the built-in system functionality that automatically creates time tables and its attributes. For this purpose, we go to the management screen of our space (Space Management). In the Time Data area, select the + Create Time Tables and Dimensions option.


In the newly opened window, we can adjust few parameters - change the business name for the table and its individual elements (year, quarter, etc.) or set the allowed time range. To complete the process, click the Create button.

The system will automatically create the appropriate objects in Data Builder. The area management screen should look like this:

Data Builder View:

To consume these objects in the Business Layer, we must first accomplish following 3 steps:
- Create a Business Entity based on time table
- Definie the Key for this Business Entity
- Link the Business Entity with transactional data using the Key
Step 1
Go to Business Builder and choose New Dimension. From the available objects, select Time Dimension – Day and click on the Create button.

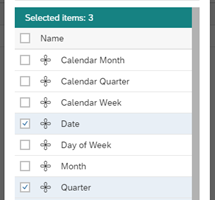
On the Entity edit screen, go to the Attributes field and use the button next to the plus to view all the attributes that the system automatically added to our object. In this example, we select Date, Quarter and Year and then click on the Apply button..


Step 2
To create a key definition, go to the Key Definition tab and press the plus button. In the Business Name field, enter the business name for the key, in the Key Field field, from the available elements select the Date object. Use the Verify function in the upper right corner and then save the key ( Save button).

Step 3
In order for the created Time Dimension to be available during data analysis, it should be added as an association for transactional data. To do this, go to the edit screen for Business Entity that holds the transactional data (information on how to create Analytical Dataset (informacje, jak utworzyć taką jednostkę, znajdują się HERE), i w zakładce Associations tab click on the plus button.

For the Target Business Entity field select the created time dimension, then in the Foreign Key Field select the Date object. Save the association.


Although we are not using it in this example, it is worth mentioning that the Association Context option allows you to name an association. This is useful when we have different kind of dates in the transaction data (e.g. shipment date, delivery date, etc.) and we create several links (associations) for them to the same time dimension.
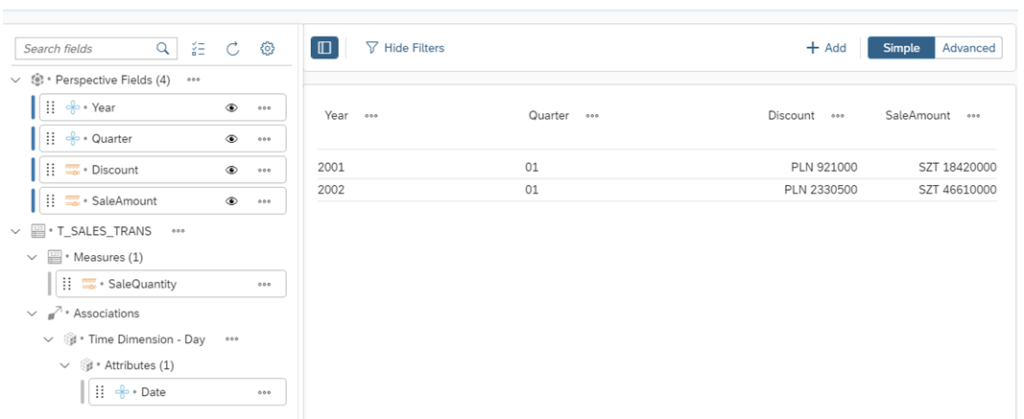
Now going to Data Preview , we can see that the Time Dimension and all its elements that we selected at the beginning are freely available during data analysis.


